Pages

Saturday, October 30, 2010

VMware View 4.5 - Thin Client with PCoIP using Windows 7 (Part 1)


Note: that this works with all View Client versions View 4.5, 4.6 and 5.0.


Series of Posts
For what must be the fourth time at work we're looking in to deploying a Thin Client environment. This time we're focusing on VMware View 4.5 and looks to have addressed many of the problems we had in the past. We've stood up a VMware View and a few other systems in the past but weren't satisfied with them.

Our big use case where View machines can be offered to students via VPN and connected to from home using the student's own hardware and everything works perfect. However one of the use cases management wants VMware View to fill is as a replacement for actual Student labs on campus. Where a lab machine is running VMware View and offering students their choice of VM's. This also needed to be accomplished with the following firm constraints.
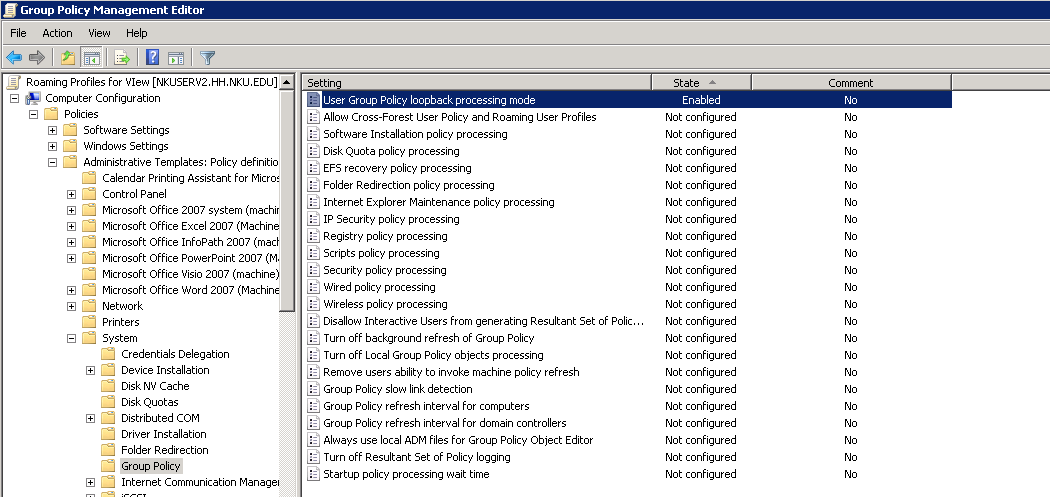
  • VMware View 4.5
  • Reuse existing PC's in labs as the client hardware.
  • Use PCoIP has the protocol for enhanced multimedia experience.
  • Lock down the PC hardware.
  • Management of the hardware is required. (Example: SCCM and/or Forefront)
  • Easy of Client deployment.
The issue became what OS and how to configure it on the current lab hardware. VMware doesn't really supply a good guide on this for View 4.5. What’s even more surprising appears to be a lack of a good community supplied setup guide; at least that I've found after looking. Sorry if' I've just missed it.

And there appears to be no way of doing a bootable image (WinPE or Linux) that uses PCoIP.  Further research believes me to believe that short of running Windows embedded or a full blown copy of Windows is the only option for PCoIP on re-purposed hardware client.

After approaching this problem and lack of helpful walk through on line I hope this will be just that to others interested in a same or similar setup. I have worked out a method to reach all these constraints and am interested on what the on-line community thinks of it as I will be using Windows 7 as the client OS and PCoIP as the protocol. I'll be posting the solution and steps to creating it in next several posts starting with this one as the length to this guide proves necessary.

Special Thanks to Patrick Towles, Paul Ritter, and Matthew Campbell for their help on this subject..

Tuesday, October 26, 2010

Useful Tivoli Storage Manager (TSM) Commands

One thing that really gets old for me is trying to remember the endless number of TSM commands that can best be described as tricking TSM to give me the information I’m looking for. In the past I’ve kept a useful list in Google Wave but sadly with that going away I’ve decided to keep them here for all of us to use.


(All Commands were tested on TSM 5.5 as of 10/26/2010)

Nodes not associated with a schedules
select node_name from nodes where node_name NOT IN (select node_name from associations)

Number of nodes associated per schedules
Select domain_name, schedule_name, count(node_name ) FROM associations GROUP BY domain_name, schedule_name

Number of Volumes per DRM State
Select state,count(*) as "Number of volumes" FROM drmedia GROUP BY state

Total client data stored (TB) - takes a bit to run
Select CAST(FLOAT(SUM(logical_mb)) / 1024 / 1024 AS DEC(8,2)) FROM occupancy

Client Schedules - The like can be used to filter
select * from associations where node_name like '%'

Number of Schedules per node
select node_name, count(node_name) as "c2" from associations group by node_name order by "c2"

Fragmentation Level of the DB
Select cast((100 - (cast( Max_Reduction_MB as float ) * 256 ) / (cast(Usable_Pages as float) - cast (Used_Pages as float) ) * 100) as decimal(4,2)) as Percent_Frag from DB


Also http://thobias.org/tsm/sql/index.html has some really great TSM SQL commands.

Install Steps for Microsoft Live@Edu SSO (Single-Sign-On) on Windows 2008 and WIndows 2008 R2

I while back i wrote some quick notes on the install steps to setup Microsoft Live@Edu SSO on a Windows 2008 R2. Some of the details may be different for you enviroment and a later issues i point out may be resolved since i was working with Version 4.1. I worked on this when I wrote http://liveatedussolinks.codeplex.com/ which allows SSO to login to Outlook Live and Live@Edu from SharePoint 2010. (I really need to upload the newest version of the SharePoint WebPart to both Sites but email me if you want a copy.)
UPDATE 4-3-2012 : Sorry I've not been updating this project in a bit, I've actually rewrote this project and am looking around at creating or sale this SSO Login with support for a small fee but honestly don't know a good way of going about it. Anyone have an idea about how to go about this? Is it wise to do it your self or sell it to someone and let them resale it.
I assume you've already registered your site to use SSO with Microsoft and they have sent you a certificate to use. I had to work with them as the cert they sent was invalid but hopefully you have better luck than I did and it works on the first request. If you need it you must setup with Microsoft the Windows LiveID SSO Kit. if you haven't already done this go to the Live@edu service management portal (http://eduadmin.live.com/), select Single sign-on. Then, click Request SSO Support to request the SSO SDK and certificate.

Download Newest Version - Microsoft Live@Edu SSO and extract contents on the server we're going to be configuring and working from the same server do the following.

Import the Microsoft Certificate
  • Open MMC
    • add snap in for Certificates
    • chose computer account - local computer
    • Navigate to Personal Certs
    • Import the Cert Microsoft sent you for SSO
      • mark as exportable, no password needed
      • If imported a sapipartner.com entry should be added
      • Right click the sapipartner.com and chose all tasks
        • Manage Private keys
          • add everyone full and give full access
          • Need to sit down and figure out what is actually needed but this works
Install Microsoft Passport RPS (Relying Party Suite)
    • From the extracted folder Install rps64.msi
      • Warning: You must launch the msi with compatibility mode.
      • Chose Production
      • RPSServer.xml
      • leave rpscomponent.xml blank
      • leave sitename and everything else blank
      • leave DEK and everything else blank
      • NT AUTHORITY\NetworkService
      • navigate to c:\Program Files\Microsoft Passport RPS
        • copy RPSNetwork.xml to c:\Program Files\Microsoft Passport RPS\config
    • Test Microsoft Passport RPS by running rpsDiag.exe
      • click run
      • All should be green, if not use the errors and fix till they are all Sucessfull
    Install winhttpcertcfg.msi
    • open a Administrative command window to "C:\Program Files (x86)\Windows Resource Kits\Tools"
    • Run the following
    winhttpcertcfg.exe -g -a %ComputerName%\NetworkService -c LOCAL_MACHINE\My -s sapipartner.com
    
    • Check that granting private key access for account NT Authority\NetworkService works

    Create Web Site

    • Install Web Services Role (IIS)
      • Enable management Features
    • Copy SSOPortal folder from Microsoft Live@Edu SSO extracted folder  to C:\inetpub\wwwroot\
    • Edit web.config - This is very important, there are notes that come in the Microsoft Live@Edu SSO extracted folder on what to change.
    • Open IIS Manager
      • Convert SSOPortal an application.
      • Change the authentication to windows
      • Disable anonymous Authentication
    Test the SSOPortal site with http://(servername)/SSOPortal/default.aspx

    Warning: The following was only needed for Windows 2008 R2
    • Open MMC (fix only for 2008 R2)
      • add snap-in "Component Services"
      • open till DCOM Config
      • open properties on RPSSvc
        • Under Security
        • Give everyone full access
          • Need to sit down and figure out what is actually needed but this works

    Friday, October 22, 2010

    Passing Arguments in PowerShell to Start-Process

    Recently while automating a Tivoli Storage install with a Powershell script I noticed trouble passing arguments to the normal Start-Process cmdlet. In this case I was calling msiexec.exe and then passing it arguments to it to the installer, it was an issue due to the fact that most of the arguments had quotes and spaces.

    Later in on the same project I was working with a command line and wanted the command output . I noticed that Start-Process didn’t allow me to have the output lines in a string array. The result was that both problems could be solved by writing a function that wrapped Start-Process and allowed a solution to both problems.

    function StartProcess ($FileToExecute,$Arguments,$ClientDir , $printCommandtoConsole) {
     $Tempfile = "$Env:TEMP\tempfile.txt"  
     New-Item $Tempfile  -ItemType file  -Force
     
     Start-Process $FileToExecute -ArgumentList $Arguments -Wait -WorkingDirectory $ClientDir -RedirectStandardOutput $Tempfile 
     
     if($printCommandtoConsole){
      Write-Host "$ClientDir\$FileToExecute" $Arguments
     }
     
     Get-Content $Tempfile
     Remove-Item $Tempfile -Force 
    }
    

    Here's an example of showing the creation of the arguments and then calling the StartProcess function.

    function InstallTSMScheduler {
     $Arguments = @()
     $Arguments += "install"
     $Arguments += "scheduler"
     $Arguments += "/name:`"TSM Scheduler`""
     $Arguments += "/node:" + [Environment]::MachineName
     $Arguments += "/password:`"$NodePassword`""
     $Arguments += "/clientdir:`"$ClientDir`""
     $Arguments += "/optfile:`"$ClientDir\$OptFile`""
     $Arguments += "/autostart:no"
     $Arguments += "/startnow:no"
     
     StartProcess "$ClientDir\dsmcutil.exe" $Arguments $ClientDir $printCommands
    }
    
    $CommandLog = InstallTSMScheduler 
    $CommandLog
    }

    I'll Post the rest of the Tivoli Client Install Script at a later date if some one wants it.

    Seems i wasn't the only one with the problem (link here)

    Tuesday, October 19, 2010

    Emulex 10 Gb CNA Crash - VMware and Windows

    Update 1 - 04-08-2011 - VMware and Emulex now has a stable driver so theres no need in the beta driver.

    We recently purchased Emulex 10 Gb CNA Cards for our new and existing VMware ESX Hosts and other large bandwidth servers. However we have seen nothing but problems with them crashing. After going round and round with VMWare, Cisco and Emulex we seem to have a stable build using a beta driver build we received from Emulex. This driver is only for the Ethernet controller on the card; in other words the be2net driver.

    The problem seems to be with any version of the driver that has TCP Offload enabled. On the windows drivers we were able to configure the driver to disable this "Feature" which made the cards stable. On Vmware the drivers at current time only go up to VMware ESX/ESXi 4.x Driver CD for ServerEngines BladeEngine 10Gb Version "2.102.440.0" released on 2010/09/16. Problems you'll notice with this driver is if you change VLAN ID’s on a Network the ESX host will crash with a purple screen. Other problems will arise like hosts would lose the ability to talk to each other intermittently. However the switching the VLAN ID case was used to case the crash on demand for testing.

    Our network guy pushed and we were able to get a beta release of the be2net driver. The build is version be2net-2.102.474.1 and from what we read in it the notes we got. This build allows you to enabled and disable vlan offloading with the default being disabled. Like the Windows driver we worked with on windows 2008 R2 that appears to be all that’s needed to make the driver stable.

    Below is the screen shot of the ESX with the beta unsigned driver running an ESX Host that’s been stable for last 2 weeks and pasted every test we could think of to try.


    We also tested a QLogic 10 Gb CNA since we considered switching to it however it had the same issue with crashing with TCP offload. We wonder if they are both using the same chip.

    No fix of yet would allow us to enable this feature.

    Update 1: Newer Beta Drivers Listed

    Thursday, October 14, 2010

    Windows GPO's work best on New Profiles

    After the last 3 hours of reboots and gpupdate in vain, let’s remember the following rule when working with Windows GPO’s.

    When you change a GPO that makes changes to user settings like folder redirection. do the following;
    1. Delete the profile from which you intend to test from
    2. Run "gpupdate /force" from the Client
    3. Reboot the Client (logoff should work but just to be sure.)
    In my case I was creating a GPO to redirect student profiles to their network drives. I was doing 2 different Redirects in the same GPO, however only 1 of them was applying. This odd behavior with no error in the logs to speak of was what really blinded me to the solution.

    Also for a tip, if a GPO needs to be applied to an OU, but needs to affect user settings instead of computer settings. The GPO has to enable User Group Policy loopback processing mode. This will enable it to apply the users settings to a GPO applied to computers.
    The settings is under Computer Configuration, Policies, Administrative Templates, System, Group Policy.

    Wednesday, October 13, 2010

    ManageEngine's Password Manager Pro says Invalid License File

    At work we use ManageEngine's Password Manager Pro to store any Sever and Application passwords. Without a doubt I would recommend it to anyone needs a password manager for a team or teams of people.

    We recently had a issue where our Password Manager Pro didn't correctly read a valid license file. It would read the Company and a few other features however would fail to validate the rest of the file saying that it was an Invalid License File. After working with support they sent the following fix.

    ManageEngine Password Manager Pro, Product Version 6.2.0

    1. Stop the PMP server if it is running.
    2. Go to \lib folder and take a back up of AdventNetLicense.xml, petinfo.dat and product.dat and store them outside the \lib folder.
    3. Download the license_fix.zip file from the following URL and extract it under \lib folder.

    4. Ensure that AdventNetLicense.xml file is not present in the \lib folder.
    5. Start the PMP server and apply your license XML file again.

    Tuesday, October 12, 2010

    How to Encrypt VMware VM running Windows 2008 R2 with Microsoft Bitlocker

    A piece of software at work has a HIPAA requirement that the drive is to be encrypted. No problem right, we use Microsoft BitLocker on our windows severs and PC’s. So in keeping with that I worked out a way to do so with our VMware Virtual Machines but it should work with any type of Virtual Machines as well.

    The Goal: To encrypt windows 2008 using the built in Microsoft BitLocker.

    The Problem:  Since we are working with a Virtual Machine there isn’t a TPM (Trusted Platform Module) Chip. This is normally where Bit locker would store the encryption key.

    The Solution: BitLocker can use a USB or floppy drive to store the key in the case the hardware doesn’t have a TMP chip on board. That fact alone doesn’t do a lot of good with a VM because the USB would would always have to be mounted to the VM. However we can use that feature to instead point it to a disk volume we create to store the encryption key.

    A few details about my environment:
    • VMware ESX 4.1 Hosts
    • VM with Windows 2008 R2 already running and ready to encrypt.
    • Our domain as already been extended to store BitLocker keys (see here for more.)
    • Our GPO policy that Bit Locker requires TPM to backup to AD DS.
    Firstly enable Bitlocker on Windows 2008 and 2008 R2 Server. Its a Server Feature you can enabled called “BitLocker Drive Encryption”.

    Next we will need a volume to store the encryption key since our VM doesn’t have a TPM Chip. You should add a additional Hard Drive to the VM and format it NTFS and mount it. I made mine 100 MB and labeled it  “EncryptionKey”. Another method would be to shrink the OS Volume by 100MB and create the volume from the freed up space however this shouldn’t be done as resizing the drive and extending the volume is then prevented. It’s better to just create a the new Virtual hard drive.

    After the drive is added, formated and labeled  open the Run prompt and launch "gpedit.msc", We need to set the Group Policy Object (GPO) settings to enable BitLocker to store the key on a drive instead of TPM and to make sure it takes a backup of the key and stores it in AD.


    Local Group Policy being used to edit BItLocker Settings

    Friday, October 8, 2010

    Hide the Blogger Nav Bar

    While setting up this blog one of the things I found useful for the design and feel was being able to hide the top Navigation bar. By adding the following to your HTML Template to Hide the Blogger Navigation Bar from being seen on your/their site.

    /* Hides the Blogger Nav Bar  */
    #navbar-iframe {   display: none !important; }